Time synchronization not working in Windows 10 operating system? Let's look for the problem and try to fix it.
More than once, for almost the entire period of use new version operating system, I notice that the clock on the Taskbar periodically starts to fail. Either they are automatically translated a few hours ago, then a few ahead.
It was possible to quickly solve the problem by disabling and enabling the automatic time setting switch in OS Settings. But this turned out to be a temporary solution. The problem appeared again and again.
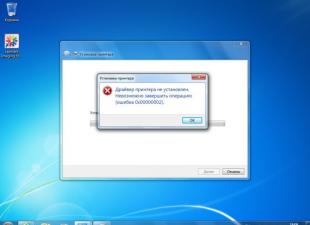
There were also frequent cases when the service failed. The system time could not be synchronized over the Internet.
And now, as of today, on my computer this problem is completely solved. The culprit turned out to be the incorrect configuration of the “W32Time” service by default. Next, I will talk about its correct setting. Ready? Go!
TIME SYNCHRONIZATION
Open the system (press the keyboard shortcut Win + X) and enter:
Services.msc
then press the Enter key and wait for the program window called “Services” to appear.
Find “Windows Time Service” in the list and open its settings window by double-clicking the mouse cursor.

Now about what needs to be done. Click the "Start" button and make sure that the status of the service is "Running", and also set the Startup Type to "Automatic". Then click on the “Apply” and “OK” buttons.

You don't need anything else! If, after the changes made, the clock continues to fail, try to find solution in the following:
- run system utility at Command Prompt with administrator rights. After the end of its work, restart the computer;
- turn off and back on auto mode setting the time zone and time in OS Settings;
- change the Internet server for synchronization;
- force the operating system to synchronize time using the Command Line (you can find a sequence of commands on the Internet).
I think that in most cases, the first method will help you. If you know of other ways, please unsubscribe in the comments.
You can view other useful computer tips in. Our Google+ and Facebook pages are waiting for you. The button and widget are located at the top right.
Many users of computers and laptops very often complain that the time is constantly lost on their devices, so it has to be corrected periodically. Moreover, as practice shows, sooner or later almost any of us faces this problem. Why is this happening? How to deal with this problem? We will talk about all this right now.
Switching to winter and summer time
A few years ago in our country, every autumn and spring, we set the clock hands one hour back or forward, respectively. However, then the government decided to cancel the transitions. That's just operating system Windows, whether it's XP, Vista or 7, still automatically adjusts the clock!

On the "Date and Time" tab, select "Change Time Zone...".

In the window that opens, uncheck the box "Automatically switch to daylight saving time and vice versa." More details in the screenshot:

Server Synchronization
There is a problem of a different nature. By default, operating systems update, which also affects the current time. In other words, as soon as you go online, the system automatically synchronizes with the server and updates the time for your time zone itself. And since not all servers know yet that in Russia the clock hands are no longer translated, such a mess occurs.
The solution is very simple. Click on the clock again, click on "Change date and time settings...", then select the "Internet Time" tab.

Click Change Settings. Uncheck the box next to "Synchronize with an Internet time server" and click OK. Everything, now synchronization is completely disabled.

Battery on motherboard
If you used the two methods described above, but it did not help you at all, then the problem most likely lies in the battery on the motherboard. Many will be surprised - a battery? What is this? In fact, this is a very important element of any computer or laptop.

This element power supply is necessary so that the system could store data on the system settings, because otherwise, every time the PC was turned on, this data would be lost and then it would be necessary to create new settings every time. Of course, this is extremely inconvenient. The battery helps a lot in this regard, while its life can be calculated in decades, although it usually lasts 5-8 years.
It is installed on the "motherboard" and it is very easy to find it yourself - just look at the board. Replacing it is also easy, but remember that you need to do this strictly with your PC turned off. This battery can be purchased at any store that sells components for computers, it is inexpensive. After replacement, you should completely get rid of the problem.
Motherboard problem
Even if, after replacing the battery, the time continues to reset, then, perhaps, one of the elements ordered to live for a long time motherboard. It is very difficult to figure out this problem on your own, since there are no problems besides “temporary difficulties”, so we recommend taking the “motherboard” to a service center for diagnostics.
Any suggestions for a topic? Write!
In fact, synchronizing the time in Windows 7 is very simple. Now you will see for yourself.
The first thing you need is internet access. If you are already online, then just follow a few steps.
Click on the clock located in the system tray.
A window will appear "Date and time" with three tabs. You need to go to the tab Internet Time.(By the way, the word "Internet" is written with a small letter).
Which server to synchronize time with
So, you have switched to the "Internet Time" tab. Most users have their computer configured by default to automatically sync with the time.windows.com server.
You can specify another server by clicking on the button "Change settings".
In the window that appears, you can click on the button "Update Now" to check with the Microsoft time server.
Or select another time server in the drop-down list.
On my computer, the time was not updated automatically because ESET ENDPOINT ANTIVIRUS bundled with the firewall is running in learning mode. So I clicked on the button and created a rule to allow time synchronization. The time will now sync automatically.

 Gajus /
 It's no secret that even electronics cannot achieve absolute accuracy. This is evidenced at least by the fact that after a certain period the computer's system clock, which is displayed in the lower right corner of the screen, may differ from real time. To prevent such a situation, it is possible to synchronize the exact time with an Internet server. Let's see how this is implemented in practice in Windows 7.
The main condition under which you can synchronize the clock is the presence of an Internet connection on the computer. There are two ways to synchronize the clock: using standard Windows tools and using a third party software.
Method 1: Time synchronization using third-party programs
Let's figure out how to synchronize time over the Internet using third-party programs. First of all, you need to select the software to install. One of the best programs in this direction is considered SP TimeSync. It allows you to synchronize the time on your PC with any atomic clock available on the Internet via the NTP time protocol. Let's figure out how to install it and how to work in it.
- After launching the installation file, which is located in the downloaded archive, a welcome window of the installer opens. Click Next.
- In the next window, you need to determine where the application will be installed on the computer. By default, this is the programs folder on the disk. C. It is not recommended to change this setting unless absolutely necessary, so just click Next.
- A new window informs you that SP TimeSync will be installed on your computer. Click Next to start the installation.
- The SP TimeSync installation process on the PC starts.
- Next, a window opens, which says about the end of the installation. Click to close it. Close.
- Click the button to launch the application. "Start" in the lower left corner of the screen. Next go by name "All programs".
- In the list of installed software that opens, look for the SP TimeSync folder. Click on it for further steps.
- The SP TimeSync icon will be displayed. Click on the indicated icon.
- This action initiates the launch of the SP TimeSync application window in the "Time". So far, only local time is displayed in the window. To display the server time, click on the button "Get Time".
- As you can see, now both local and server time are displayed in the SP TimeSync window at the same time. It also displays metrics such as delta, latency, start, NTP version, accuracy, freshness, and source (in the form of an IP address). To synchronize your computer clock, click "Set time".
- After this action, the local time of the PC is brought in accordance with the server time, that is, synchronized with it. All other indicators are reset. To compare local time with server time again, click again. "Get Time".
- As you can see, this time the difference is quite small (0.015 sec). This is due to the fact that synchronization was carried out quite recently. But, of course, it is not very convenient to synchronize the time on the computer manually every time. To set up this process automatically, go to the tab "NTP client".
- In field "Get Every" you can specify a period of time in numbers, after which the clock will be automatically synchronized. Next, in the drop-down list, it is possible to select the unit of measure:
- Seconds;
- minutes;
- Watch;
- Day.
For example, let's set the interval to 90 seconds.
In field "NTP server" if desired, you can specify the address of any other synchronization server, if the one that is set by default ( pool.ntp.org) does not suit you for some reason. In field "Local port" best not to make changes. By default, there is a number «0» . This means that the program connects to any free port. This is the best option. But, of course, if for some reason you want to assign a specific port number to SP TimeSync, you can do this by entering it in this field.
- In addition, the same tab contains the accuracy control settings that are available in the Pro version:
- Try time;
- Number of successful attempts;
- Retry limit.
But since we describe free version SP TimeSync, then we will not dwell on these possibilities. And to further configure the program, move to the tab "Options".
- Here, first of all, we are interested in the point "Run at Windows startup". If you want SP TimeSync to start automatically when the computer starts, and not to do it manually every time, then check the box next to the specified item. In addition, you can check the boxes next to the items "Minimize tray icon" and "Run with minimized window". By setting these settings, you will not even notice that the SP TimeSync program is running, since it will carry out all actions to synchronize time at a set interval in the background. The window will need to be called only if you decide to make adjustments to the previously set settings.
In addition, for users of the Pro version, the ability to use the IPv6 protocol is available. To do this, you just need to check the box next to the corresponding item.
In field "Language" if desired, you can choose from a list of 24 available languages. By default, the system language is set, that is, in our case, Russian. But English, Belarusian, Ukrainian, German, Spanish, French and many other languages are available.


Thus, we have configured the SP TimeSync program. Now every 90 seconds will happen automatic update Windows 7 time according to the server time, all of this running in the background.
Method 2: Synchronization in the "Date and Time" window
In order to synchronize time using the built-in capabilities of Windows, you need to perform the following algorithm of actions.
- Click on the system clock located in the bottom corner of the screen. In the window that opens, navigate to the inscription "Change date and time settings".
- After starting the window, go to the section "Internet Time".
- If this window indicates that the computer is not configured for automatic synchronization, then in this case click on the inscription "Change settings...".
- The settings window starts. Check the box next to "Synchronize with an Internet time server".
- After performing this action, the field "Server", which was previously inactive, becomes active. Click on it if you wish to select a server other than the default one ( time.windows.com), although this is not required. Choose the appropriate option.
- After that, you can perform an immediate synchronization with the server by clicking "Update Now".
- After completing all the settings, click OK.
- In the window "Date and time" press too OK.
- Now your time on the computer will be synchronized with the time of the selected server once a week. But, if you want to set a different automatic synchronization period, then it will not be as easy to do as in the previous method using third-party software. The point is that in the user Windows interface 7 simply does not provide for changing this setting. Therefore, you will have to make adjustments to the system registry.
This is a very responsible business. Therefore, before proceeding to the procedure, think carefully about whether you need to change the automatic synchronization interval, and whether you are ready to cope with this task. Although there is nothing unusually complicated here. You just need to approach the matter responsibly, in order to avoid fatal consequences.
If you still decide to make changes, then call the window "Run" by dialing the combination Win+R. In the field of this window, enter the command:
Click OK.
- The system editor window opens. Windows Registry 7. In its left part there are registry keys presented in the form of directories placed in a tree form. Go to section "HKEY_LOCAL_MACHINE" by double-clicking on its name with the left mouse button.
- Next, in the same way, go sequentially to the subsections "SYSTEM", "CurrentControlSet" and Services.
- A very large list of subsections opens. Look for a name in it W32Time. Click on it. Go to subsections Time Providers and "NTPClient".
- On the right side of the Registry Editor, subsection parameters are presented. "NTPClient". Double click on the option "SpecialPollInterval".
- The parameter change window is launched "SpecialPollInterval".
- By default, the values in it are set in hexadecimal. The computer works well with this system, but it is incomprehensible to the average user. Therefore, in the block "calculus system" move the switch to position "Decimal". After that in the field "Meaning" number will be displayed 604800 in the decimal system of measurement. This number displays the number of seconds after which the PC clock is synchronized with the server. It is easy to calculate that 604800 seconds equals 7 days or 1 week.
- In field "Meaning" parameter change window "SpecialPollInterval" enter the time in seconds after which we want to synchronize the computer clock with the server. Of course, it is desirable that this interval be less than the one set by default, and not more. But it is up to each user to decide for himself. As an example, we will set the value 86400 . Thus, the synchronization procedure will be performed once a day. Click OK.
- Now you can close the Registry Editor window. Click the standard close icon in the top right corner of the window.


Thus, we set up automatic synchronization of the local PC clock with the server time once a day.
Method 3: command line
The next way to start time synchronization involves using command line. The main condition is that before starting the procedure you are logged in with an account name with administrator rights.


You can synchronize time in Windows 7 either using third-party software or using the internal capabilities of the operating system. Moreover, it can be done different ways. Each user simply has to choose the most suitable option for himself. Although objectively using third-party software is more convenient than using built-in OS tools, it should be taken into account that installing third-party programs creates an additional load on the system (albeit a small one), and can also be a source of vulnerabilities for malefactors.
You may have noticed that the operating Windows system 7 can independently, without your intervention, translate the time (hours). This is especially true when there is a transition from winter time to summer time, and vice versa. This process is called time synchronization.
The operating system receives data from servers. Those, in turn, transmit data to your computer, and if they do not converge, then the time is automatically adjusted. But there are situations when this synchronization does not occur, or occurs but the time on the clock is not set correctly. This is the problem we are going to fix right now.
First, we need to find out what these time synchronization servers are. So that you do not look for them for a long time, I will post a list of available Russian and Ukrainian servers:
For Russia:
timeserver.ru
ntp.mobatime.ru
ntp1.stratum2.ru
ntp2.stratum2.ru
ntp3.stratum2.ru
ntp4.stratum2.ru
For Ukraine:
time.in.ua
Now let's go directly to setting up time synchronization in Windows 7. To do this, right-click on the clock, which is located in the lower right corner of your screen (on the taskbar).

Next press " Changing date and time settings".

The "Date and time" window will open, in which you will see three tabs: " date and time", "Additional hours" and " Internet time". Just the last tab we need. Click on it. In it you will find out that your computer is being synchronized with the server " time.windows.com". Accordingly, if your clock does not show the correct time, then you need to change the server - click on the button" Change settings".

The " Internet time setting". In it you will see a line in which you can enter any other time server than the one that is installed by default. Copy the address of any time synchronization server that is indicated at the beginning of this article and paste it into this line " Server ". And then click " Update now".

After a few seconds, the synchronization process will complete and the time on your computer will change. Then just click "OK" and close the "Date and Time" window.