– one of the main tools when working with computers. The time of floppy disks has long passed; CDs are also gradually losing popularity. On the contrary, flash drives continue to develop and are very popular.
When working with this storage medium, sometimes it becomes necessary to format a flash drive. For example, in order to quickly delete all files or clean a flash drive after being infected with viruses. Now we will tell you how to format a flash drive.
The Windows operating system allows you to format a flash drive or any other disk directly from the “My Computer” window. To perform this procedure, connect the USB flash drive to your computer and open the “My Computer” window. Find your flash drive and call the context menu (right click on the flash drive icon).
In the menu that opens, select “Format”. After this, a standard window will open in front of you. Here you can specify the settings that will be used when formatting the flash drive.

Let's look at the formatting window settings:
- The first drop-down menu is “Capacity”. This shows the capacity of your flash drive. This setting cannot be changed;
- Next drop down menu " File system" Here you can select one of the file systems available for this flash drive:
- NTFS;
- exFAT;
- The last drop-down menu allows you to select the cluster size. It is better to leave this flash drive formatting option as default;
- The “Restore default settings” button returns all settings to standard;
- The volume label is the name of the flash drive, which will be visible when it is connected to the computer. You can specify any convenient name;
- A quick format (clearing the table of contents) is a format that does not physically remove data from the drive. Instead, a clean file system is written to the disk and the disk can be used as an empty disk. If you uncheck the box next to “Quick formatting,” the data will be completely deleted, but the formatting process may take a very long time;
Once you have specified all the parameters, you can begin formatting the flash drive. To do this, just click on the “Start” button. If you have enabled “Quick Format”, the flash drive will be ready in just a few seconds.
In addition, you can format using command line. To do this you need to open a command prompt Windows string and enter the appropriate command.
To open the command line, use the Win+R key combination. After this, the “Run” menu should open in front of you. Here you need to enter the command “CMD” and press enter.

You can also open the command prompt by searching in the START menu or in Start Windows screen 8. To do this, click on the Win button and enter “CMD” after which you will see a prompt to launch the command line.

At the command line, formatting flash drives and other drives is performed using the “FORMAT” command. To get all the information about using this command, enter "FORMAT/?".
When formatting a flash drive, the “FORMAT” command can accept the following parameters:
- volume – Specifies the drive letter (the letter is indicated with a colon);
- /FS – Indicates what type of file system will be used when formatting the flash drive (FAT32, FAT, or UDF).
- /V – Assignment of volume label (name of flash drive);
- /Q – Parameter that enables quick formatting;
- /C – Used only for the NTFS file system: Setting the default compression mode for all new files created on the flash drive;
- /X – Initiates a volume shutdown as the first action;
- /R – Used only for the UDF file system: This parameter indicates the UDF version (1.00, 1.02, 1.50, 2.00, 2.01, 2.50) that will be used when formatting the flash drive. The default version is 2.01;
- /D – Uses UDF 2.50 file system only. Duplication of meta data;
- /A – Set the cluster size. No special need this parameter It’s better not to change;
An example command for formatting a flash drive via the command line:
- format G: /FS:NTFS /Q /V:MyFlash

Let's look at this command in more detail:
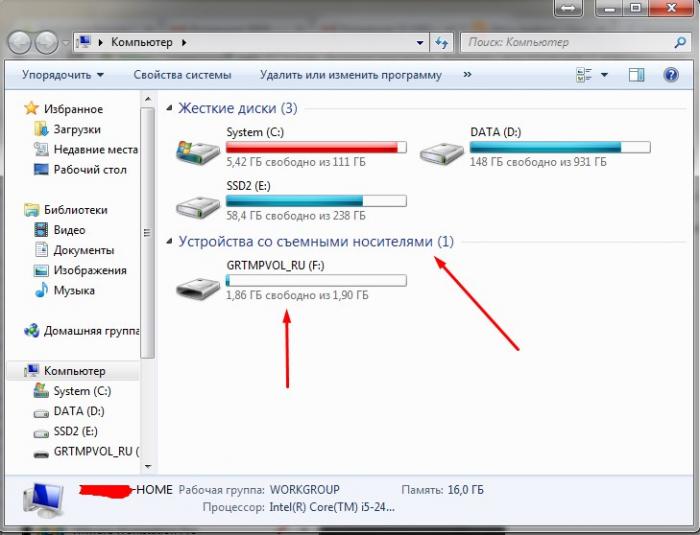
- format G: – this part of the command starts formatting the disk designated by the letter G. To find out what letter your flash drive is designated by, open the “My Computer” window.
- /FS:NTFS – this part of the command sets the file system that will be used when formatting the flash drive. IN in this case this is NTFS.
- /Q - this part of the command indicates that it is necessary to perform a “quick” format, without complete removal all data.
- /V:MyFlash – this part of the command specifies the volume label that will be assigned to the flash drive after formatting. In this case it is MyFlash.
Good day.
You work with a flash drive, you work, and then bam.. and when you connect it to the computer, an error is displayed: “The disk in the device is not formatted...” (example in Fig. 1). Although you are sure that the flash drive was previously formatted and there was data on it ( backup files, documents, archives, etc.). What to do now?..
This can happen for many reasons: for example, when copying a file, you removed the USB flash drive, or turned off the electricity while working with the flash drive, etc. In half the cases, nothing happened to the data on the flash drive and most of them can be recovered. In this article I want to look at what can be done to save data from a flash drive (and even restore the functionality of the flash drive itself).
1) Disk check (Chkdsk)
If your flash drive starts asking for formatting and you see a message like in Fig. 1 - in 7 out of 10 cases, a standard disk (flash drive) check for errors helps. A program for checking the disk is already built into Windows - it is called Chkdsk (when checking the disk, if errors are found, they will be automatically corrected).
To check the disk for errors, launch the command line: either through the START menu, or press the Win + R buttons, enter the CMD command and press ENTER (see Fig. 2).
Next enter the command: chkdsk i: /f and press ENTER (i: is your drive letter, note the error message in Figure 1). Then the disk check for errors should start (an example of work in Fig. 3).
After checking the disk, in most cases all files will be available and you can continue working with them. I recommend making a copy of them right away.
Rice. 3. Check the disk for errors.
By the way, sometimes administrator rights are required to run such a check. To run the command line as an administrator (for example in Windows 8.1, 10) - just right-click on the START menu - and in the pop-up context menu select " Command Line (Administrator)«.
2) Recovering files from a flash drive (if the check did not help...)
If the previous step did not help restore the flash drive’s functionality (for example, sometimes errors like “ File system type: RAW. chkdsk is not valid for RAW disks"), then it is recommended (first of all) to restore all important files and data from it (if you don’t have them on it, you can proceed to the next step of the article).
In general, there are a great many programs for recovering information from flash drives and disks, here is one of my articles on this topic:

After installing and launching the program, you will be asked to select a disk (flash drive) and start scanning it (we’ll do just that, see Fig. 4).
Next, a window with scanning settings will open. In most cases, you don’t have to change anything else; the program automatically selects the optimal parameters that will suit the majority. Then click the start scanning button and wait for the process to complete.
The duration of scanning depends on the size of the flash drive (for example, a 16 GB flash drive is scanned on average in 15-20 minutes).
Important! You need to restore files not to the same flash drive that you scanned, but to another physical medium (for example, hard drive computer). If you restore files to the same media that you scanned, then the recovered information will overwrite sections of the files that have not yet been recovered...
Rice. 6. File recovery (R-STUDIO).

There, points that were omitted in this section of the article are touched upon in more detail.
3) Low-level formatting to restore a flash drive
I would like to warn you that you cannot download the first utility you come across and use it to format a flash drive! The fact is that each flash drive (even from the same manufacturer) can have its own controller, and if you format the flash drive with the wrong utility, you can simply disable it.
For unambiguous identification, there are special parameters: VID, PID. You can find them out using special utilities, and then search for a suitable program for low-level formatting. This topic is quite extensive, so I will provide here links to my previous articles:

- - instructions for restoring the flash drive:
- - flash drive treatment:
That's all for me, good work and fewer mistakes. Best wishes!
Thank you in advance for your addition to the topic of the article.
Flash drive– a removable, solid-state USB drive that is used to transfer or store information by users. There are often cases when, as a result of some kind of failure, it is not possible to format a flash drive. The flash drive itself consists of two components: a controller and memory. There are a great many reasons why a drive can fail, but some of them can be resolved on your own.
We already had an article about. We did this in the standard way.
If you can’t format a flash drive using standard methods from the window "My computer", then you can try using additional means.
Formatting using the command line
To do this, go to the menu "Start" and point "Run"(this item can be called using hot keys Win+R), after which we enter "cmd". The console will open. We will use the command "chkdsk", which will allow you to perform a low-level disk check.
To do this, enter into the console "chkdsk H: /f /r", Where "H:" this is the name of the disk that is a flash drive (if the name is different, you need to change it to the desired one).
After the command has been entered, you must press Enter and the check will start. The scan may take a long time, depending on the storage capacity. If the check is completed successfully, then you can format the flash drive using standard means.
Formatting using a third-party utility
Let's use the utility HP USB Disk Storage Format Tool. You need to download and unpack it. This program does not require installation, but it is better to run it as an administrator. After launching in the menu "Device" you should select the required flash drive (attention, you must choose correctly, otherwise you can damage your computer). You can navigate by the name and capacity of the drive.
Next, you need to select the required type from the menu "File System"(most often this is FAT32), set the label in the line "Volume label" and press "Start". You don’t need to check any more boxes, and if they are, you need to disable them. If formatting was successful, the flash drive will continue to work.
The above methods are only suitable if the USB drive is detected by the system normally; if this does not happen, it means that the flash drive controller is most likely damaged and repair will require more effort. If the memory chip is not damaged, then after the above manipulations the flash drive should start working normally. And most importantly, to avoid losing valuable data, you should always do backup copy data placed on a flash drive, then if the flash drive fails, it can be easily disposed of without worrying that the data is lost.
Hello. Despite the fact that a flash drive is a fairly reliable storage medium (compared to CD/DVD drives, which are easily scratched), problems do occur with them...
One of these is an error that occurs when you want to format a flash drive. For example, during such an operation, Windows often reports that the operation cannot be performed, or the flash drive simply does not appear in “My Computer” and you cannot find and open it...
In this article I want to look at several reliable ways to format a flash drive that will help restore its functionality.
Formatting a flash drive through computer control
Important! After formatting, all information from the flash drive will be deleted. It will be more difficult to restore it than before formatting (and sometimes even impossible). Therefore, if you have the necessary data on a flash drive, first try to restore it (link to one of my articles:).
Relatively often, many users cannot format a flash drive because it is not visible in “My Computer”. But it is not visible there for several reasons: if it is not formatted, if the file system is “broken” (for example, Raw), if the drive letter of the flash drive matches the letter hard drive etc.
Rice. 2. Computer management.
Next, on the left, there will be a tab “ Disk Management“, it needs to be opened. This tab will show all media that are only connected to the computer ( even those that are not visible in “My Computer”).
Then select your flash drive and right-click on it: from context menu I recommend doing 2 things - replacing the drive letter with a unique one + formatting the flash drive. As a rule, there are no problems with this, except for the issue of choosing a file system (see Fig. 3).
A few words about choosing a file system
When formatting a disk or flash drive (or any other media), you need to specify the file system. There is no point in describing all the details and features of each now; I will indicate only the most basic:
- FAT is an old file system. There is not much point in formatting a flash drive in it now, unless, of course, you are working with old Windows operating systems and old equipment;
- FAT32 is a more modern file system. Works faster than NTFS (for example). But there is a significant drawback: this system does not see files larger than 4 GB. Therefore, if you have files larger than 4 GB on a flash drive, I recommend choosing NTFS or exFAT;
- NTFS is the most popular file system today. If you don’t know which one to choose, stop with it;
- exFAT is a new file system from Microsoft. To simplify, consider that exFAT is an extended version of FAT32, with support for large files. Among the advantages: it can be used not only when working with Windows, but also with other systems. Among the disadvantages: some equipment (TV set-top boxes, for example) cannot recognize this file system; also old operating systems, for example Windows XP - this system won't see.
Formatting via the command line
To format a flash drive via the command line, you need to know the exact drive letter ( This is very important, if you specify the wrong letter, you may format the wrong disk!).
Find out the letter the desired disk very simple - just go to computer control(see previous section of this article).
Then you can launch the command line ( to run it - press Win+R, and then enter the command CMD and press Enter) and enter a simple command: format G: /FS:NTFS /Q /V:usbdisk
Command decoding:
- format G: - the format command and the drive letter are indicated here (do not confuse the letter!);
- /FS:NTFS is the file system into which you want to format the media (file systems are described at the beginning of the article);
- /Q - quick format command (if you want the complete format, just omit this option);
- /V:usbdisk - here you set the name of the disk that you will see when you connect it.
In general, nothing complicated. Sometimes, by the way, formatting via the command line cannot be performed if it is not run as an administrator. In Windows 10, to launch the command line as an administrator, just right-click on the START menu (see Fig. 5).
Rice. 5. Windows 10 - right-click on START...
Flash drive treatment [low-level formatting]
I recommend resorting to this method if all else fails. I also want to note that if you make low level formatting- then it will be almost impossible to recover data from the flash drive (which was on it) ...
To find out exactly what controller your flash drive has and choose the right formatting utility, you need to find out the VID and PID of the flash drive ( these are special identifiers, each flash drive has its own).
There are many special utilities for determining VID and PID. I use one of them - ChipEasy. The program is fast, lightweight, supports most flash drives, sees flash drives connected to USB 2.0 and USB 3.0 without problems.
If special The utility is not on the list - I recommend using the HDD Low Level Format Tool.
HDD Low Level Format Tool
Rice. 8. Operation of the HDD Low Level Format Tool program.
The program will help with formatting not only flash drives, but also hard drives. It can also perform low-level formatting of flash drives connected via a card reader. Overall, a good tool when other utilities refuse to work...
I’ll wrap this up, I’ll be grateful for any additions on the topic of the article.
Best wishes!
Good afternoon
It is very easy to format a flash drive in any operating system Windows family and the procedure is practically the same in different versions. In my example, Windows 7 will be used, but there are practically no differences from Windows XP, Windows 8 and Windows 10.
How to format a flash drive:
1. Insert the flash drive into any USB port on your computer. The USB connector looks like this:
In my case, the flash drive is already inserted and glowing (turned on). IN modern computers It doesn’t matter at all which connector (2.0 or 3.0 as you see in the picture) you insert the flash drive into.
2. Click on the "Start" button and select "Computer" (For Windows XP, the appearance of the button is slightly different, but it is in the lower left corner of the screen. "Computer" in Windows XP is called "My Computer".

3. In the window that opens, find your flash drive that needs to be formatted.
4. Right-click on the flash drive and select "Format..."

5. The “Formatting” program menu will open in front of you; let’s talk about it in more detail.

Of all the settings, we are only interested in two - File system and Volume label. Volume Label- this is the name of the flash drive. If you are not satisfied with the current name, call it in your own way, you can use both Latin and Russian letters. If you will use the flash drive not only with a computer, it is better to give it an English name, since some players do not understand Russian and there will be an error. File system- if the flash drive will only be used to transfer information between computers, select NTFS. For compatibility with various players (on a TV or in a car), it is better to choose FAT32.
The "Quick (cleaning table of contents)" checkbox can only be unchecked if the flash drive was not formatted correctly the first time or something does not work correctly after quick formatting.
6. Click the "Start" button and wait for the process to complete.

All! Your flash drive is formatted and ready to go!


