Before updating the BIOS, it is recommended to back up the current contents of the ROM. The fact is that many motherboard manufacturers put on their websites only latest versions BIOS, which can sometimes cause problems or not meet your needs. Having a backup, you can always return to the BIOS version that previously existed on the computer. For creating backup run your BIOS updater motherboard and see if it offers a backup. If it doesn’t, look at the motherboard manufacturer’s website to see which BIOS versions are available for download on it and whether there is one that is currently installed on your computer among them. If there is no way to back up and the site does not have the current BIOS version of your computer, you will have to use alternative methods.
One of the advantages of the EPROM programmer is that it can be used as a device Reserve copy removable ROMs in case they later fail. At the same time, most motherboards manufactured today contain soldered ROM chips. AT this case the only way out is to use the DEBUG program to read the contents of the ROM and save it to a file on disk. A backup copy of the contents of the ROM stored in a file can also be useful for other purposes. For example, in it you can find information lines displayed on the screen; you can also disassemble the code and find out how it works.
ROM code typically occupies 128 KB of RAM in two 64 KB segments: E0000-EFFFFF and F0000-FFFFF. The BIOS of video adapters or other cards is stored at addresses C0000-CFFFF and D0000-DFFFF. Due to the nature of the DEBUG program, each 64 KB segment must be saved separately.
To use the DEBUG program to save segments E000 and F000, enter a series of commands.
C:\>DEBUG ; Starting the DEBUG Program
R BX ; BX case change (high order file size)
BX0000 ; From value 0
:one ; To value 1 (indicates a 64 KB file)
N SEG-E.ROM ; File name
M E000:0 FFFF CS:0 ; Moving 64 KB of data from the BIOS to the current code segment
N SEG-F.ROM ; File name
M F000:0 FFFF CS:0 ; Moving 64 KB of data from the BIOS to the current code segment
W0; Write file at offset 0 to code segment
Write 10000 bytes; 10000h = 64K
Q; Shutting down DEBUG
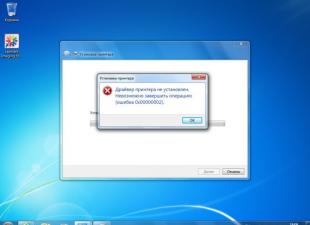
The result of this set of commands in Windows XP is shown in the figure below.
The instructions above allow you to save 64 KB segments at addresses E0000-EFFFF and F0000-FFFFF in files. To do this, the file size is first specified, then its name, after which the BIOS code is copied into the selected segment. The data can then be written to disk.
If you decide to keep the contents of the ROM, including the BIOS of the video adapter and the ROMs of other adapters, repeat the steps above, however, when you run the DEBUG program, you must specify the starting addresses C000:0 and D000:0. Be sure to include different filenames. It should be noted that the video adapter BIOS may not occupy the entire C0000 segment, and, in addition, some adapters may not completely use the C0000 and D0000 segments. In this case, Windows can use the corresponding areas of memory to store other data.
The SuperRecovery Hotkey option (LSHIFT+F1 - LSHIFT+F12) on Foxconn motherboards allows you to set a key combination to call the SuperRecovery utility built into the BIOS.
This utility, by reducing the available size of the hard disk, allows you to backup the BIOS Setup settings and, if desired, all data in the hidden partition.
In the BIOS Setup of new motherboards from Foxconn, in the BIOS Feature section, you have access to a number of additional tools.
Of particular interest to us here is the SuperRecovery utility built into the BIOS, which allows you to backup and restore information on your computer's hard drive.
At the same time, there is no need to install additional software, all backup / restore functions are built directly into the BIOS.
Thus, the user receives a computer on which, with some initial pre-configuration, it is always possible to back up and restore information, regardless of the health of the operating system and the presence of any software.
Over the past few years, the Xpress Recovery utility, similar in purpose, has also been built into BIOS Setup by another manufacturer of motherboards - Gigabyte Technology.
The SuperRecovery utilities from Foxconn and Xpress Recovery from Gigabyte built into the BIOS implement a very interesting backup method.
All backup data is stored in a hidden area hard drive Host Protected Area (HPA).
Before the backup is saved, a hidden area must be created on the hard drive, which is also managed by the utility itself.
In this case, the drive must comply with the ATA-5 specification or higher.
The essence of HPA is that, at certain commands, the hard disk controller cuts off part of the space from the end.
This is implemented at the hardware and software level of the drive - that is, if the volume is cut off in this way, then the hard disk controller changes the logical structure of the disk space and presents the drive to the MB controller in this form.
Now the BIOS and OS on any motherboard will see a drive of a different, smaller volume.
It is in the hidden area that backup is made, and if necessary, information is restored from it.
This is good in the sense that neither other users in the OS environment nor viruses will be able to access the hidden area where backups are stored.
In the backup utilities themselves, access to the hidden area can be password-protected in the BIOS environment.
You can only find out about the part of the drive that is allocated for hidden space only with the help of very specific means.
In the case of SuperRecovery on Foxconn boards, the size of the hidden area is set manually by the user.
The disk can always be cut in such a way that its visible volume corresponds to some standard value, then it will be very difficult for an uninitiated person to guess about the “cutting off” of the hard drive.
To launch the SuperRecovery utility, you need to hold down a certain key combination at the beginning of the computer boot.
The combination can be viewed or changed by going to the BIOS Feature section in the usual way.
The default is usually +.
In the first SuperRecovery window, you are asked to select a drive (Fig. 1), since all manipulations with data during a session are possible only within one hard drive.

Fig.1. Selecting a drive in the first window of SuperRecovery, all further manipulations will be performed only with it.
AMD Radeon Software Adrenalin Edition Driver 19.9.2 Optional

The new AMD Radeon Software Adrenalin Edition 19.9.2 Optional driver improves performance in Borderlands 3 and adds support for Radeon Image Sharpening.
Cumulative windows update 10 1903 KB4515384 (added)

On September 10, 2019, Microsoft released a cumulative update for Windows 10 version 1903 - KB4515384 with a number of security improvements and a fix for a bug that broke Windows work Search and caused high CPU usage.
Driver Game Ready GeForce 436.30 WHQL

NVIDIA has released the Game Ready GeForce 436.30 WHQL driver package, which is designed for optimization in games: Gears 5, Borderlands 3 and Call of Duty: Modern Warfare, FIFA 20, The Surge 2 and Code Vein", fixes a number of bugs seen in previous releases, and expands the list of displays in the G-Sync Compatible category.
Any computer equipment and software, as you know, becomes obsolete over time and ceases to meet current requirements. This applies equally to the primary BIOS / UEFI systems, the software of which is integrated into a special chip on the motherboard. When installing new hardware ("hardware"), it may sometimes be necessary to flash the BIOS. On a laptop, on a stationary computer terminal, such a procedure will be performed, it doesn’t matter. The technology is almost always the same. Some users who are unfamiliar with the basics of such techniques believe (and not without reason) that this process is unsafe and difficult. If you can agree with the first statement, then you can argue about the second. In fact, flashing the BIOS of the motherboard is not such a troublesome business. But for the correct implementation of such a procedure, special attention should be paid to some important details and nuances, which depend on the motherboard manufacturer and the programs and methods used for flashing.
Why do I need a BIOS flashing?
In general, if it is not planned, and the whole system is working stably, there is no point in updating the BIOS version.
But when new equipment is installed on the computer, which may not be supported by the primary system only because of its obsolescence ( Device BIOS just does not recognize), flashing the BIOS becomes an urgent problem. Although many users find this process complicated, nonetheless, anyone who works with a computer will be able to perform such steps on their own. It will take no more than 10 minutes.
Flashing the BIOS of the motherboard: prerequisites
To begin with, pay attention to a few mandatory conditions, failure to comply with which can lead to disastrous consequences.
You should download files and programs for updating primary systems only from the official resources of motherboard manufacturers. In the case of installing an unofficial firmware, no one can guarantee that the process will be successful and the system will work as expected after that.
The second thing to pay attention to is during the update. You need to make sure that there are no power surges or spontaneous disconnection of a computer or laptop from the mains, in advance.
General rules for updating all firmware
Flashing BIOS for almost all models of motherboards involves the use of the same scheme:
For standard BIOS systems, DOS mode is used in most cases. However, for some BIOS versions, as well as for more modern UEFI systems, can be applied special program for flashing BIOS, created by the manufacturer of the motherboard, which is able to run even in the environment operating systems Windows without the need to create bootable media.
How can I find out the motherboard modification and the current BIOS version?
The very first thing to do is to determine which model of the motherboard is installed in the computer system, as well as find out the version of the primary BIOS system (perhaps it is currently relevant and does not need to be updated).

You can view information about the board and BIOS version in the section that is called from the Run console with the msinfo32 command.

For the motherboard, you can also use specialized utilities like CPU-Z (formerly Everest). For a device determined in this way, on the manufacturer's website, you need to find the latest firmware and save the files on your hard drive.
Preparing Bootable Media (General Method)
In the case of using bootable media, when an update from under Windows is not provided, at the first stage it must be created. The usual recording of downloaded files will not work.

To simplify the work, you can use the Rufus utility, which is very easy to learn and creates a bootable USB flash drive in a couple of minutes. You don't need to change anything in the settings. Only in file system you should specify FAT32, and use MS-DOS mode in the recording method, be sure to check the box next to the line for creating bootable media. If this is not done, then the device will not be recognized as a bootable device when booting again. Then, in some cases, to install the update, you will need to additionally copy the control program and the firmware file to the media.
Next, the BIOS update process will be considered with examples for motherboards from several well-known manufacturers. Although in general they are very similar to each other, nevertheless, each of them has its own nuances. We assume that the priority BIOS settings already installed.
ASUS
Flashing the Asus BIOS can be done in several ways. Among the preferred utilities, it is worth highlighting two programs - AFUDOS and ASUSTeK EZ Flash 2.
When using the first utility, you should create bootable media and make sure that it contains the afudos.exe program file and the firmware itself (for example, p4c800b.rom).

ASUS BIOS flashing is as follows. Boot from flash drive. Since the media was written for DOS mode, the initial line C:\> will appear on a black screen, in which you need to write the command /i p4c800b.rom and press the enter key. Upon completion of the update, a reboot will occur, during which you just need to remove the media from the USB port so that the system starts from the hard drive.
BIOS flashing for motherboard ASUS boards when using the second utility, it is somewhat different from the previous version.
Despite the fact that most firmware on the official ASUS website have the .rom extension, sometimes CAB files can also be found. There is nothing wrong with this, since they are used for UEFI systems.

For firmware, enter the UEFI settings on reboot, switch to Advanced Mode ( additional settings) and in the service (tools) section of the Tool, select the line ASUSTeK EZ Flash 2. Next, select the media with the program from the list again (the line of the same name), after which the desired firmware file will be shown on the right. We select it and agree with the warning twice (first to check the file, then to start the firmware process).
At the end of the process, a notification about the restart will appear, and at the beginning of the restart, a proposal will be issued to conduct initial setup. Press F1 and set the desired parameters. Otherwise, just exit the settings without saving the changes.
gigabyte
Flashing the BIOS of Gigabyte systems is quite different from other processes. First of all, this is due to the fact that you can use the online update to install the firmware. But first, consider using the Q-Flash utility, which is considered to be the best for updating firmware.

First you need to enter the BIOS settings and use the option to reset all settings Load Optimized default. After that, you need to save the changes, restart the computer and enter the BIOS settings again. Further, to launch the Q-Flash utility, the F8 key is pressed, and the start is confirmed by pressing the Y and Enter keys. To begin with, it is recommended to save the current version using the Save Bios option, after which you need to use Update Bios. Next, you will be asked to specify the source from which you want to update. HDD 2.0 should be selected as the carrier (this is how the flash drive is displayed in the settings). Then everything is as usual: select the firmware file present on the media and agree with all the warnings.
For an Internet update, you can use the @BIOS utility specially developed by Gigabyte specialists, which runs in a Windows environment. In this case, it is highly recommended to disable Hyper-Threading mode in the primary system settings, as well as deactivate anti-virus and other resident applications, to avoid errors or failures during the upgrade process.
After starting the program, you can immediately save the current BIOS version by clicking the Save Current BIOS button, and then select the Internet Update online update mode, click Update New BIOS and select one of the servers in the list. After that, you will be prompted to specify the model of the installed motherboard, and the program will automatically download all the necessary components and activate the update process.
MSI
Flashing the MSI BIOS, as in the case of ASUS, can be done either from under Windows or from under DOS. For DOS mode, a BIOS-embedded tool called BIOS-MFLASH is used. But the MSI Live Update 5 or 6 application can also be used as an initial management utility. It is notable for the fact that with it you can still update all installed drivers MSI, as well as flashing the BIOS of the corresponding graphics accelerators. Let's start with him.

In the main window, you just need to check the boxes on the necessary elements. Select the MB BIOS component and press the Scan button from the bottom (Scan). If a a new version firmware will be detected, use the Download and Install button, after which the update process will start.

First you will need to select the update environment. To simplify matters, check the In Windows mode item, in the next window click the close button for all programs that appear in the list (Close all listed programs), click the continue button (Next) and in the next window click the process start button.
For DOS mode, select it from the window of the launched update process, after which we indicate the media and agree to the destruction of all data present on it (the process will take no more than a minute, after which a message will be displayed about the successful creation of the boot drive). When you reboot, you will only have to follow the instructions of a kind of "Master".
In the case of updating using the built-in MFLASH mechanism, you will have to download the firmware manually, create bootable media and perform the same actions in the BIOS as described above (select the media and firmware file in the tools menu).
Acer
Flashing the BIOS of Acer systems is surprisingly much easier. You don’t even need to create bootable media, although you still have to format it in FAT32.

To install the update, a special utility called Insyde Flash is used, which is copied to removable media. At the same time, you need to copy the firmware file downloaded from the official website, which has the .fd extension and corresponds not only to the motherboard, but also to the laptop model, to the main directory of the program on the USB flash drive. Please note that the device must contain only one firmware file, otherwise the application will issue an offer to flash only one of several. After running the utility with the power on, you will be prompted to install the update immediately.
The second way is just as simple. First you need to completely turn off the laptop, unplug the cord from the outlet and wait until the power indicator stops blinking. Next, plug the cord into an outlet, insert the USB flash drive into the appropriate port, hold down the Fn and Esc keys and press the power button. As soon as the indicator starts flashing, release the keys. After that, reading information from the drive will begin (this can be seen by the blinking of the LED on the device itself). At the end of the update process, the laptop will reboot on its own.
Video cards
Since GeForce and Radeon are dominant in the video card market, BIOS flashing will be considered using their example.

At the initial stage, for your card on the manufacturer's website, you need to download new firmware and management programs. If the system has several video cards, only one should be left for the duration of the update by inserting it into the PCI-Express slot.
For GeForce cards, the NVFlash program is used (two files), for Radeon, the ATIFlash utility (one file). Next, you need to create a bootable USB drive for DOS mode, and then copy the program and firmware files to it.
When starting from a flash drive, you should make sure that the card is single-processor, otherwise the proposed method will not work. For NVIDIA, use the nvflash --list command, for ATI - atiflash -i. If information is given on two cards, then the adapter has two processors, and the proposed firmware method cannot be used (it is better to refer to the manufacturer's website and find instructions there).
At the next stage, flashing the BIOS of the GeForce video card involves disabling protection. This is done with the nvflash -protectoff line.
Further, to start the BIOS update process for GeForce cards, use the nvflash -4 -5 -6 newbios.rom command (the name of the ROM file must match the name of the downloaded firmware), for Radeon cards - atiflash -p -f 0 newbios.rom. After that, we wait for the process to complete and reboot the system in normal mode.
Brief summary
That's all for flashing primary I/O systems. Based on the foregoing, we can conclude that the best option is to install the update exclusively in DOS mode, although you can use special utilities. But they only work if there are UEFI systems, and they are not suitable for standard BIOS versions. You need to be extremely careful with video cards, since incorrect installation of the update or the slightest violation during the flashing process can cause the graphics adapter to fail.
A universal program for removing firmware and BIOS backups from any models of laptops and personal computers.
A dump should always be done when we want to make a firmware update, update, or BIOS rollback. Sometimes they ask you to make a copy of the BIOS of a laptop or motherboard personal computer, to repair similar equipment.
And what is BIOS and how does this abbreviation stand for.
BIOS is an abbreviation for the English words Base_Input_Output_System and it translates as basic_input_output_system
Making a BIOS dump of laptops and computers using this program is very easy and simple.
Brief instructions on how to use the Universal BIOS utility Backup ToolKit 2.0 to create a bios damp, and in Russian a backup copy.
Video instructions for working with this program.
Many antiviruses detect this program as a virus, but it is not.
After downloading, you can check this archive on the website www.virustotal.com, which will say that half of the antiviruses will find various viruses in it, and the second half will not.
My AVG defines it the same as a virus. And on the beech Casper says that everything is fine.
After checking this file, see if your antivirus finds a virus in it. If so, disable it while the program is running.
Then we unpack the archive and run the resulting file with the name Universal BIOS Backup ToolKit 2.0.exe
If your system says that administrator rights are required. Then we right-click on this file and click on the item run as administrator.
After that, the program window opens, in which we see information about the type, version, size, manufacturer and date of your BIOS.
After that, press the Read button and wait until the BIOS reading process is completed.
After that, a sign will appear with the inscription that the BIOS reading was completed successfully.
We press OK. Then click the Backup button.

We are offered to choose a place where we save the BIOS dump. Choose desired folder and click the save button.

All of us have made a backup copy of the BIOS, you can update the version, sew a new one or an old one stable version BIOS.