Almost all modern processors have some potential for overclocking. The easiest and most convenient way to change and increase the processor frequency is to overclock the system bus (FSB). The processor bus frequency directly affects the speed of the computer as a whole. In addition, using this method, you can postpone the need to purchase a more powerful processor for a while.
Instruction
So, to change the system bus frequency, go into the BIOS and find the CPU Clock value in the parameters. Press Enter on this value and enter the new bus frequency. Next to this value, you will see the processor multiplier and the processor frequency itself. Don't be afraid to go overboard with the frequency value. Modern processors are designed in such a way that when such a situation occurs, the system automatically resets the value to standard settings and restarts the computer, after which everything falls into place. Therefore, feel free to experiment with frequency values and do not be afraid that you can harm the processor.
It is probably no secret to anyone that the speed of a computer can be increased not only by replacing a part with a more productive one, but also by overclocking the old one. If it's still a secret, then I'll explain🙂
Overclocking, overclocking- this is an increase in the performance of PC components (processor,, and), due to an increase in their standard characteristics. If we are talking about a processor, then this implies an increase in frequency, multiplier and voltage thereof.
2 Increase frequency
One of the main characteristics of a processor is its frequency. .
Any processor also has such a parameter as a multiplier (number), which, if multiplied by the FSB frequency, you can get the real processor frequency.
Therefore, the easiest and safest way to overclock a processor through bios is to increase the frequency of the FSB system bus, due to which the processor frequency increases.
In all variants, the processor frequency will be 2 GHz
- bus 166 and frequency multiplication factor 12;
- bus 200 and frequency multiplication factor 10;
- bus 333 and frequency multiplication factor 6 .
The simplicity lies in the fact that the FSB frequency can be changed directly in the BIOS or programmatically in 1 MHz steps.
If earlier, this method could easily end for the processor sadly (burning). Today it is very problematic to kill a multi-core processor by simply increasing the frequency.
Should a novice overclocker go too far with the processor frequency, the system will immediately reset its default settings and everything will be fine after a reboot.
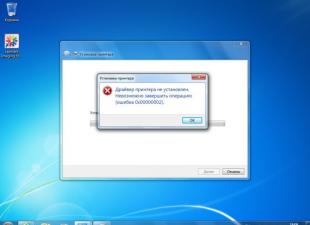
To change the bus frequency, go to BIOS and find the CPU Clock value there, as shown in the picture.
Press Enter on this value and enter the bus frequency. next you can see the CPU multiplier and the effective CPU frequency of 2.8 GHz.

Please note that the processor multiplier in the example is quite high 14x at FSB 200MHz, in this case I would recommend increasing the FSB in steps of no more than 5-10MHz (that is, the frequency will increase by 70-140MHZ).
In the case of other multiplier and frequency values, increase the bus frequency in steps of no more than 10%. There is no need to rush when overclocking, and with such a step it will be easier for us to calculate the most optimal frequency for your CPU in tests.
If you want to achieve tangible results when overclocking. Then you can not do without a good cooler, pay attention to the Zalman cooler.
Tests are carried out with temperature measurement and at maximum load on the processor. You can do this with programs such as Everest, 3D Mark.
If the temperature at maximum load is above 65-70 C, then it is necessary to either increase the speed of the cooler to the maximum, or reduce the FSB frequency.
3
The processor multiplier can also be changed. This will affect the increase in CPU frequency. For example, at a frequency:

- bus 133 and frequency multiplier 10; (1.33 GHz)
you can change the factor to 15 and get 2.0 Ghz instead of 1.33 Ghz. Not a bad increase, is it?
But there is only one thing, your processor must be unlockedmultiplier, such processors are usually marked as Extreme in case the processor is Intel and the Black Edition processor is AMD.

But even if you do not have an extreme version, you should not be upset. After all, with the right approach of the first option, you can achieve excellent results. Although, most likely, you can not do without ...
4 Voltage increase
The principle is simple. If you put more voltage on the light bulb than it needs to glow, it will burn brighter. The processor is a more complex thing than a light bulb, but the meaning is about the same.
Increasing the voltage allows you to more seriously overclock the processor. To achieve stable operation of the processor, at higher frequencies, it is necessary to increase the voltage on it. There are several things to consider here:
- be sure to put a good cooler.
- do not increase the voltage by more than 0.3 V.

To do this, go toBIOS (Del key when starting the PC), then go to Power Bios Setup => Vcore Voltegeand increase the value by 0.1 V. Next, set your cooler to the maximum and set the FSB frequency higher.
We test, if everything is fine and the performance suits you, then you can stop there.
When you reach a critical level of processor performance (that is, with a 3-5% increase in frequency, a reboot will occur), I advise you to reduce the frequency by 5%, this way you will fix your overclocking with stable work for a long time.
First you need to provide good cooling for the processor, the northbridge, and, well, for the video card with RAM. And not every motherboard can raise the frequency of the system bus (it can simply burn out). By increasing the FSB frequency, the central processor, RAM and video card will be accelerated accordingly.
2 step
As soon as we put good cooling, we turn it on to the computer and go into the BIOS. And through the settings we increase the frequency FSB. There may be one of these options: advanced chipset feature>FSB Frequency; advanced>jamped free configuration; frequency > voltage control. We increase not much, by 3-5 units. We save, exit the BIOS. Even better would be to lower the RAM timings.
3 step
After that, we boot the computer and start testing the processor (well, about 5 hours). We play various powerful games and see if the computer slows down. If it slows down (if it didn’t slow down in these games before overclocking), we stop overclocking and return everything to its place. If everything is fine, we do the same. If after the next increase the computer does not boot, then reset BIOS settings by removing the battery on the motherboard. Be careful, after overclocking, the life of your computer is reduced.
As well as:
The northbridge could burn down
The CPU may burn out.
Your video card may burn out.
May burn out RAM
Instruction
On average, the increased frequency of the system bus of the processor increases the speed of its operation by approximately 20%.
So, to change the system bus frequency, go into the BIOS and find the CPU Clock value in the parameters. Press Enter on this value and enter the new bus frequency. Next to this value, you will see the processor multiplier and the processor frequency itself. Don't be afraid to go overboard with the frequency value. Modern processors are designed in such a way that when such a situation occurs, the system automatically resets the value to standard settings and restarts the computer, after which everything falls into place. Therefore, feel free to experiment with frequency values and do not be afraid that you can harm the processor.
You can also change the processor multiplier, which will also affect the value of the motherboard bus frequency. The multiplier value is in the same place as the frequency value. For example, if you have a 133 bus with a multiplier of 10, change it to 15 and get a new frequency of 2.0 Ghz instead of the previous 1.33 Ghz. Just keep in mind that the multiplier must be unlocked. To find out, pay attention to the marking of the processor. Among such processors of the Intel, AMD or Black Edition brand, it should have an Extreme mark on it.
You can also change the bus frequency programmatically. To do this, download and install the Al Booster program on your computer. Launch the application and, in the window that appears, find the Display tuning panel icon. Click on it to bring up an additional panel. Find the Tuning section on this panel, in which check the box for Exsternal frecuency.
Thus, you have activated bus acceleration. At the bottom you will see plus and minus icons, by clicking on them, increase or decrease the frequency of the bus. After selecting the appropriate frequency, click the Apply button at the bottom of the program window. After that, restart your computer and work with the new frequency.
Related videos
Related article
The processor is the most important element of a computer. The speed of the operating system and other elements of the computer depends on its frequency. If you think your processor is running too slow, there are two ways to speed things up: either upgrade your processor to a newer and more powerful model, or try to programmatically increase the processor's clock speed. This process is called Overclocking and is widely used by many PC users.

Instruction
To get started, carefully examine the capabilities of your . It is better to do this by reading the possibilities on the manufacturer's website. The fact is that not everyone is amenable to overclocking, but among those with whom it is possible to carry out this operation, a large one accelerates by 10-15%. This is clearly not enough to notice in the operation of the system.
Download and install ClockGen. This utility is specially designed to change the processor settings in the Windows operating system environment. With this program, you can increase the processor clock speed without resorting to configuration in the BIOS.

If increasing the processor frequency is not enough for you, then you will have to resort to setting in the BIOS. When the computer starts, press Del. Once you have entered the BIOS, press Ctrl+F1. Depending on the manufacturer of the motherboard, the processor settings in the BIOS may be in different menu sub-items. Usually these items are: CPU, Advanced or Advanced Chipset Features. The overall processor frequency is obtained by multiplying the multiplier by the standard frequency. These parameters should be increased gradually, restarting the computer after each change. Periodically increase the voltage applied to the processor, because running at a higher frequency requires more voltage.

Make sure the cooler is working and the thermal paste is intact.
The process of overclocking the processor is not as complicated as it might seem at first glance. In the process of performing this task, you should observe some precautions and be very careful not to overdo it and not "kill" system board.

You will need
- Instructions for the computer motherboard, utilities for analyzing and testing the system (for example, Everest), thermal paste for the processor (may be needed in some cases), a program for overclocking the processor (in case of software overclocking of the processor).
Instruction
Before proceeding directly to the overclocking procedure, it is necessary to study some technical documentation, namely the instructions that came with the motherboard. This is necessary in order to find the corresponding sections in the BIOS.
Then it is necessary to decide in what way the procedure will be performed. There are two ways - programmatically (using special programs designed for this) and hardware (overclocking method through standard means BIOS). The software method of overclocking the processor in this article will not be considered, due to the fact that, as a rule, programs come with detailed instructions.
Before starting overclocking, check the status. If it is, it must be replaced. Then you need to clean and ensure that as much air as possible enters the system unit(to do this, one of the side covers is removed). Then you need to enter the BIOS (this is done by pressing the F2 or Del key when the system boots). Now in the BIOS you need to find the function that determines the frequency of the memory, and install it minimum value(this is done so that the process of overclocking the processor is not limited by memory). This function can be located in sections that relate to processor overclocking or memory overclocking and timing, in most cases it has one of the following names: Advanced Chipset Features, or Memclock index value, or Advanced, or POWER BIOS Features, or System Memory Frequency , or Memory Frequency.
Next, go to the Frequency / Voltage Control menu (POWER BIOS Features, or JumperFree Configuration, or? Guru Utility - other name options). Here you need to find the item that determines the value of the FSB frequency (options for the name of the item: CPU Host Frequency, or CPU / Clock Speed, or External Clock). After the desired item is found, it must be smoothly increased. This is where you need to be careful and patient. When increasing the readings of the item, you do not need to increase them by a lot, but by a little bit. After each increase, you must save the settings (the corresponding request when exiting BIOS) and restart the computer. After that, you need to use certain utilities to check whether the processor has overclocked, as well as the stability of the system.
Related videos
Overclocking the CPU is an effective way to increase the performance of your computer without spending a lot of money. If you are careful when performing overclocking steps, you will protect your computer and its components from damage.

You will need
- Programs: CPU-Z, OSST or S&M.
Instruction
Before you start overclocking the processor, determine specifications processor. Find out what frequency the "top" model of the family has in order to set the minimum task for the upcoming . Find out the processor core version. Its and overclocking potential often differ. For more information on how well a particular series overclocks, visit specialized websites. For example, on the portal http://www.overclockers.ua.
Determine the model and manufacturer of the motherboard. This data will allow you to find it on the Internet if you have difficulties with overclocking the CPU. To identify the processor and motherboard, use the CPU-Z program. It does not require installation. Just unzip the archive and run the program.
Check the CPU cooling system and . To do this, after shutting down the computer, unplug it from the mains and remove the left side of the case. Look at the CPU cooler. If its design is massive, there are heat pipes, then the cooling system will be sufficient for serious overclocking of the CPU. If there is a radiator with an 80 mm fan, or another similar system, then the overclocking possibilities will be limited.
Test the stability of the system using specialized programs. For example, S&M for AMD processors, Over Clock Checking Tool (OSST) - to check Intel processors. These programs create a powerful computational load on the processor. The absence of crashes in these programs indicates the stability of the CPU.
After completing the preparatory procedures, proceed directly to overclocking. Restart your computer. When Press DEL to run Setup appears, press the Del key to enter the BIOS.
Go to the Extreme Tweaker tab and click on At Overclock Tuner. Select the Manual value and click the Enter key.
In the DRAM Frequency item, set the frequency of the RAM. And in the DRAM Timing Control item, click Manual, and in the settings of the CAS# Latency, RAS# to CAS# Delay and RAS# Precharge parameters, change the value to "5" using the "+" and "-" keys. Change the RAS# Active Time value to "15".
In the VCORE Voltage item, set the standard CPU supply voltage. This value is shown by the CPU-Z program. In the DRAM Voltage item, increase the voltage on the RAM by 0.2-0.3V. Increase the FSB frequency by 10 MHz from the original value.
Download the OS. Run OSST or S&M program, run stability test. Use HWMonitor to check the temperature of PC components. If the test is successful, raise the FSB frequency by another 5-10 MHz.
In the BIOS menu, in the VCORE Voltage item, increase the value by 0.05 V. If the FSB frequency is significantly increased, increase the voltage on the north bridge of the motherboard. In the Extreme Tweaker tab, in the North Bridge Voltage item, increase the voltage with the "+" key.
Do a stability test. If the system passes it, you can stop there or continue overclocking until the voltage reaches critical values \u200b\u200band ceases to help increase the frequency.
After reaching the maximum frequency of the CPU, lower the RAM timings in the DRAM Timing Control item.
Related videos
note
For motherboard chipsets manufactured by Intel, Nvidia and AMD, the estimated critical temperature is 70'C. If this value is exceeded, the cooling needs to be improved. north bridge.
Useful advice
The cooling system and system stability are of great importance for CPU overclocking. Be sure to perform the appropriate checks before starting.
Upon reaching the maximum frequency of overclocking the CPU, lower the timings gradually, one at a time, checking the stability of the system after each change.
Sources:
- The Computer: A Practical Encyclopedia from ComputerBild. 2nd Edition, ComputerBuild, 2009.
There are times when you not only need to increase the frequency of the processor, but also reduce it. This need arises if the computer is mainly used to solve light tasks that do not require a lot of hardware resources. Reducing the frequency of the processor will reduce its power consumption and temperature. Also, the processor cooling system will work quieter.

You will need
- Windows computer, AMD processor, Cool-n-Quiet software, AI Booster software, Internet access
Instruction
If you are using an AMD processor, you can use the Cool-n-Quiet program to lower the processor frequency. This program should be included with the motherboard drivers. If you do not have it in stock, download it from the official AMD website.
Just install the program on your computer and then restart your PC. Now, when the load on is small, the program will automatically reduce the frequency of the processor. Accordingly, the processor and speed will decrease. Please note when this application is not always possible with various programs control the speed of work.
You can also lower the processor frequency using the AI Booster program. Download this application from the Internet and install it on your computer. After installing the program, restart your PC. On the program panel, find the button with an arrow, clicking on which will open another additional program panel.
In this panel, find the line CPU. Under this line, select External frequency. Below is the indicator responsible for overclocking the computer processor. Opposite this number there will be two buttons - "+" and "-". Use the "-" button to lower this figure by a few points. Save the settings by clicking on the Apply line. The computer will restart and the processor will slow down.
If you are using a laptop with an operating Windows system 7, to lower the frequency of the processor, you can use the system capabilities. Click successively "Start" - "Control Panel". Select the "Power" component, and in it - the item "Energy Saver". Now in idle mode, the processor speed will be reduced. This method can also be used on home PCs. Just in comparison with laptops, the result will not be so noticeable.
Almost any modern processor has the potential for overclocking. Also, overclocking can save you from having to buy a more powerful processor for a while. One of the easiest and most convenient ways to increase the frequency of the processor is bus overclocking (FSB). In this way, you can increase the speed of the processor by an average of 20 percent.

You will need
- - Computer with Windows OS;
- - AI Booster program.
Instruction
The procedure for overclocking modern processors is completely safe, as they are equipped with protection against overheating, and in which case, the settings will automatically be returned to safe ones. You can overclock the FSB bus both with the help of programs and using the BIOS. Next, the procedure for overclocking the bus will be considered using an example program.
Download the AI Booster program from the Internet. Install the app. Restart your computer after installation. Run the program. There are icons on the right side of the program window. When you hover over the icon with the mouse, an inscription appears. Select the icon that says Display tuning panel. After that, an additional program panel will appear on the side.
Now on this panel, find the Tuning section and check the Exsternal frecuency item. Now you have activated the bus overclocking feature. The bus frequency is written a little lower. There are also "+" and "-" signs at the bottom. By pressing "+", you increase the frequency of the bus. Increase the bus frequency as much as you need. You need to select the bus overclocking parameter based on the cooling that is installed on the processor. If you have normal cooling with a standard cooler, 15-20 MHz will be enough. If you bought a separate heatsink with a powerful cooler, you can overclock more, but you should not exceed 30-40 MHz.
When you have selected the bus frequency, click Apply at the bottom of the window. After that, you will be prompted to restart your computer. Agree. After the reboot, the bus will operate at the new frequency, and, accordingly, the processor speed will also be increased.
If you notice that after increasing the frequency of the bus, the processor began to get very hot, do the following. On the additional panel of the AI Booster program, check the Enable QFan item. Then, by clicking on the “-” sign, lower the indicator under this item to 25 and click Apply. The rotation speed will be maximum.
Sources:
- how to change tires yourself
The frequency of almost all modern processors can be changed. If you play, run several applications at the same time, then the processor frequency needs to be raised. If in the near future you are not going to load the processor, then it can be lowered. Lowering the frequency will reduce power consumption and reduce the speed of the cooling fan.

You will need
- - Cool "n" Quiet program;
- - program SpeedStep;
- - ClockGen program.
Instruction
First you need to deal with lowering the frequency of the processor. You can do this manually only if it has been overclocked. The nominal frequency of the processor cannot be reduced using the same methods that increase it. You can lower the voltage on the processor, but this is a little different. The only exceptions are some laptop models. In most cases, you need to do things a little differently.
If you have an AMD processor, then the Cool "n" Quiet program will help you lower its frequency. It should be on the driver disk for your motherboard. If you do not have a disk, then the program can be downloaded from the official website of AMD. Install Cool "n" Quiet on your computer. Now, when the load on the processor will be minimal, the processor frequency will decrease. When the load increases (especially when switching to 3D mode), the processor frequency will be restored to the factory value.
For Intel processors, the SpeedStep program is suitable. You just need to download and install it on your computer. The difference is that when you start the program, you can choose the mode of the program.
To raise the frequency of the processor, the ClockGen program is well suited. Find one of the latest versions of it on the Internet. The program does not require installation. Just unzip the ClockGen archive to any convenient folder. Please note that the program may not be compatible with some motherboards. If so, then the overclocking function, which will be discussed below, will not be there.
Run the program. In the window that opens, move the top slider to the right, and then click Apply. The processor frequency will increase slightly. If the computer will work normally, you can increase the frequency a little more. If failures in the system begin, the frequency must be reduced. Thus, select the optimal processor frequency.
To increase computer performance, it is recommended to change the parameters of the central processor. One of the important points for setting up the CPU is changing the voltage supplied to this device.

You will need
- - Clock Gen;
- - CPU-Z.
Instruction
If you want to use additional utilities to increase the performance of the central processor, then use the Clock Gen program. Download exactly the version that is designed to work with your motherboard model. Note that you still have to open the BIOS menu to change the voltage on the processor.
Enter the BIOS by restarting the computer and pressing the Delete key. Go to Advanced menu Chipset Setup or just Advanced. Find the CPU Voltage parameter and increase its value. Don't turn up the tension too much. Press the F10 key and wait for the operating system to load.
Now launch the Clock Gen app. By changing the position of the sliders located opposite the AGP and FSB items, change the values of the CPU multiplier and its bus frequency. After setting the desired parameters, click the Save button.
Install and run the CPU-Z application. Perform a CPU health check. Make sure this device is stable. remember, that set voltage may not be enough to greatly increase CPU performance.
If you do not wish to use additional programs, then open the Advanced Chipset Setup menu again. Find the item that displays the frequency of the CPU bus. Increase its value. If you don't want to change the bus frequency, increase the CPU multiplier value by one point.
Restart your computer and use the CPU-Z utility to evaluate processor performance and stability. Be sure to periodically increase the voltage on the processor. Achieve the perfect balance between its performance and the voltage supplied to this equipment. If the voltage is too high, other devices may stop working, such as an integrated sound card.
Related videos
Compact computers are very convenient because of their main advantage - small size. However, powerful components cannot be installed in a device of such small dimensions, so PDAs usually lose a lot in comparison with laptops or desktop computers.

Instruction
There are programs with which you can somewhat improve the performance of your PDA. The Pocket Hack Master program has a wide range of possibilities for overclocking a PDA. Find the program and download to HDD computer, and then copy to the device's memory. As a rule, such software can be found on the site softodrom.ru or soft.ru. Be sure to use anti-virus software when downloading files. Install the app in operating system PDA by running a file with the CAB extension.
Run the program. The main window of Pocket Hack Master will offer several sections for configuration: Speed configuration, Scale configuration, CPU load monitor, Set device speed, Application speeds, Process viewer. Go to the Speed configuration section. Despite the fact that the program interface is in English, there will be no problems using it.
Select the desired frequency of the device. In this section, you can test the set frequency - do it, because if the parameters are set incorrectly, the PDA will freeze. Suitable settings can be marked as favorite. In the Set speed section, you can set the frequency manually. In the Application speed section, you can adjust the frequency during operation installed apps. Changes made will only take effect when running program overclocking. Therefore, check the boxes for start automatically and minimize on auto start.
Do not forget that the overclocked device will consume more electricity, as its power increases. Don't be surprised if overclocking your PDA will greatly reduce its battery life. Also, do not forget that overclocking such devices can lead to breakdowns. Developers default to standard parameters system so that there is no load on the processor. When overclocked by a third party software various errors may occur in the system.
Methods for overclocking the central microprocessor
In order to increase the performance of the processor, it needs to be overclocked. There are two ways to do this: 1) increase frequency multiplier 2) increase the frequency of the system (FSB) bus. The first method is safer and more stable, since increasing the processor frequency multiplier only affects its clock frequency, but the second method is more efficient, since increasing the FSB frequency of the bus will affect the performance of all devices located on it (processor, chipset, RAM). Despite the obvious advantage of the second method, in order to achieve maximum performance, it is desirable to use both methods and find the optimal ratio.
The younger representatives of the processor line lend themselves best to overclocking, because the older ones are based on the same core, and the manufacturer has already tried to “squeeze” out of them, if not the maximum, then almost the maximum performance. But there is one more “BUT”, you cannot change the frequency multiplier of modern Intel processors at all, it is simply blocked, and for AMD processors you can change the multiplier of only Black Edition processors of models that are top-end, and which already work almost to the limit.
Based on the foregoing, applying the first overclocking method will not always work out.
Increase the multiplier or frequency of the FSB bus should be gradually to see the maximum allowable operating values. Also, increasing the voltage on it can affect the overclocking of the processor, but not by much - up to 10%, after increasing the voltage, the processor will be able to operate at a higher frequency. Increasing the voltage on the chipset can improve bus overclocking.
- Your motherboard should be from good well-known manufacturer with good top chipset. With a weak chipset, you will not achieve maximum overclocking when using the second method, namely increasing the frequency of the system bus. FROM motherboard unknown production, you can forget about stable work during overclocking, plus there is a risk of sending the board to another world.
- Install a good fast memory, since with an increase in the FSB frequency, the frequency of the memory operation increases, which in turn may not work at a high frequency, although the processor will still have a margin.
- Before overclocking the system bus reduce the frequency of memory, chipset and other PCI/PCI-e devices, so that the possibility of increasing the FSB of the bus does not rest on the performance of other devices. And only after full overclocking, gradually increase their frequencies to the operating limit.
- Before overclocking, disable all power saving technologies and computer radiation reduction technologies.
- Follow temperature overclocked devices, if necessary, change the thermal paste or cooling in general.
- It is desirable to perform all these operations in the BIOS, and not to use Windows utilities.
If, during the execution of these operations, you are faced with the fact that after a reboot, computer refuses to start, and possibly emits a nasty squeak, most likely you have exceeded the permissible operating parameters. To restore your computer, you need